How to impress the crap out of your family (or yourself) this holiday season
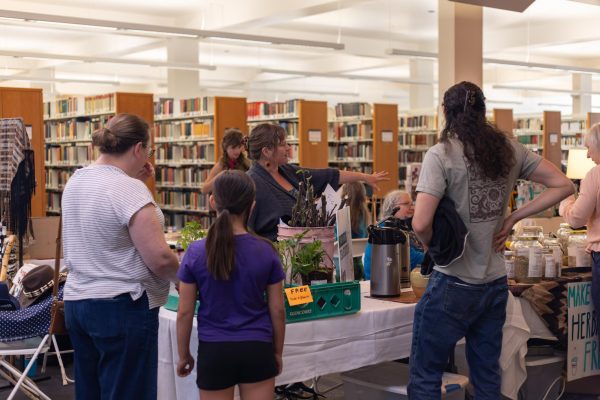
Going home for break and want to show your family how going to college has matured you? Staying on campus and want to make yourself a tasty and indulgent treat? Going to a holiday party and want to bring something to share? These recipes are sure to wow and amaze. They’re easy, festive, and will give you a seat at the adults’-only table this year.

1. Savory Roasted Acorn Squash (Can be made vegan/dairy-free)
This is a side dish I invented that sounds fancy, feels fancy, but has only three ingredients. I do not recommend eating the skins, but technically, you can. To make vegan or dairy-free, use vegan butter.
- Preheat the oven to 400 degrees.
- With a sharp knife, slice a mostly- or completely-green acorn squash in half lengthwise. Scoop out seeds and slimy bits with a metal spoon, discard. Cut squash into 1-inch-thick half moons. This is best achieved by placing a squash half flesh-side-down and cutting perpendicular to the ridges. Discard the stem and pointed tip, so all pieces are flat.
- Place 1-2 tablespoons of unsalted butter in a microwave-safe dish. Heat in the microwave until butter is completely liquid.
- Sprinkle Old Bay seasoning mix (Yes, the seafood stuff. Trust me) generously into butter. Half a teaspoon per tablespoon of butter is a good place to start. Add more or less to your taste. Mix.
- Arrange squash on a non-stick baking sheet so they are not touching. Brush spiced butter onto top sides of squash. It’s okay if butter drips everywhere. Save your remaining butter for later.
- Bake in the oven until fork-soft and undersides begin to crispen slightly, about 25-35 minutes depending on size.
- Remove baking sheet from the oven and carefully flip all squash pieces. Re-melt your remaining butter, and brush onto the flesh again.
- Put back in the oven until the bottoms begin to crisp, about 10-15 minutes. The squash should be more-than-soft by now and the oven should smell heavenly.
- Serve warm as a side. If you’re like me and don’t like the skins, hold tight to a corner and use the side of your fork to scrape the yummy bits off.

2. Butternut Squash Soup (Vegan)
This soup can be served with a crusty bread as the star of the show or as a light side. To make a little heavier, add unsweetened full-fat coconut milk or heavy cream to your liking. Recipe adapted from Love and Lemons.
- Peel, de-seed, and cube one butternut squash (½-inch to 1-inch cubes). Squash can be any size, though I prefer a nice 2 to 3 pounder. While your knife and stuff is out, chop a white or yellow onion. If you have it, mince 3 cloves of garlic, a tablespoon of fresh sage, a half-tablespoon of fresh rosemary, and a teaspoon of fresh ginger. You can sub in dried/jarred versions of these, too.*
- Add oil and onion to a large stock pot on medium heat. Saute until onions are soft, about 5 minutes or so.
- Add butternut squash and allow to soften for 8 to 10 minutes. It will not soften all the way. At least be able to prick the surface with a fork.
- Add garlic and herbs, stir and cook for one minute.
- Pour in 3 cups of vegetable broth. Bring to a boil then reduce to a simmer. Simmer for 20 to 30 minutes. The butternut squash should be as soft as warm butter.
- Remove from heat and allow to cool slightly (Trust me, it needs to cool a little bit or your hands will be sorry).
- Working in batches if needed, blend until smooth in a blender. I like to pour my finished soup into a separate pot. Serve hot. Can be stored in the fridge and reheated on the stove or in the microwave.
*Use three teaspoons of jarred minced garlic, a teaspoon of dried sage, a half-teaspoon of dried rosemary, and a half-teaspoon of dried ginger as needed to replace fresh versions.

3. Pasties (Not vegan, though I’d love to find out if it works for you to make it so!)
A recipe taught to me by my dad, it can be easily adjusted to your liking once you make it once or twice. Also, it’s pronounced “past-eez,” not “paste-eez.” Get your mind out of the gutter.
- Twenty minutes before beginning, take pre-made pie crusts out of the fridge to soften slightly. If making fresh, homemade pie crust–first of all, good on you. Second of all, make sure it is pliable. I recommend 2 to 3 total pie crusts. Do NOT microwave your crusts to make them pliable! (I learned the hard way…)
- Preheat oven to 365 degrees.
- Finely chop one rutabaga, one large carrot, one small yellow onion, and one medium red potato, peeling first as necessary. I chop them to the size of my fingernail or smaller.
- In a large bowl, dump half a pound of raw and thawed ground meat. My family uses venison, but I know beef or turkey would work too. Though I haven’t tried it, Impossible burger would work here.
- Mix all chopped veggies in with raw meat or “meat,” using either your hands or a large spoon to thoroughly combine ingredients. Add salt, pepper, thyme, parsley, and oregano for a more classic taste. This is your filling.
- With a sharp knife, unroll and slice pie crusts down the middle, forming two semi-circles with each.
- Form small mounds of meat/veggie filling in half of each semi-circle, leaving at least a ¼-inch border around. Place a small pad of butter on top of the filling.
- Fold the empty half over the mound and seal the edges by rolling towards the center and then pressing down. It is important that your pie crust is pliable, or else it will rip. You should end up with little, sealed hand pies that are shaped like a slice of pizza.
- Using a sharp knife, poke two slits in the top of each, for steaming.
- Arrange pasties on a nonstick cookie sheet, making sure they do not touch.
- Make an egg wash (literally just a whisked raw egg) and brush onto tops of pasties. This will help them brown.
- Bake for 50 to 60 minutes, or until the tops and bottom are golden brown. To be safe, I check the internal temperature with an instant-read thermometer (160 for ground red meats and 165 for poultry). My dad swears that if the crust is done, then the insides are done. In my experience, he is right.
- Serve hot with ketchup and/or hot sauce drizzled on top. Can be stored in the fridge/freezer and gently reheated later.

4. Chocolate Orange Cookies (Can be made vegan/dairy-free)
For you avid cookie-bakers out there, yes, this is the Tollhouse recipe, slightly altered for some holiday oomph.
- Preheat oven to 375 degrees.
- In a large bowl, beat two sticks of softened butter with ¾ cup of packed brown sugar and ¾ of white sugar. It should combine to a “cream.” I find this is easiest with a hand or stand mixer.
- Add two eggs and one teaspoon of vanilla extract, mix until well-combined.
- Zest one navel orange into the mix. Slice orange in half and squeeze the juice out of one half into the mix. Stir to combine.
- Add 2 ¼ cups flour, 1 teaspoon of baking soda, and 1 teaspoon of salt (omit salt if your butter is salted). Use some elbow grease and stir to combine! A dough should form. It will be a little wetter than normal, but firm. If desired, add additional flour until less sticky.
- Fold in 16 oz. of semi-sweet or dark chocolate chips.
- Form dough into rounded tablespoon-sized balls and plop onto an ungreased cookie sheet.
- Bake cookies in batches for 9 to 11 minutes, or until golden brown on the edges.
- Serve as soon as you can without burning your mouth! Just kidding. Transfer to a cooling rack about 5 minutes after removing from the oven. Can be stored in an airtight container for up to a week.
5. Rosemary Simple Syrup
Though I’ve only used rosemary syrup to make delicious and unique coffees, syrup can be used in a wide range of beverages. Put some in a fancy jar and booom, you have a gift for someone you care about but they say they don’t need anything.
- Combine equal parts sugar and water in a small saucepan (I recommend starting with ½ cup of each to see how it turns out.)
- Bring to a boil, stirring as it heats to fully dissolve the sugar.
- As soon as it fully boils, take it off the heat.
- Add a handful of fresh rosemary that you’ve ripped off the main stem. I like mine strong, so I put a LOT! A little less than a quarter-cup would be a good starting point if using ½ cup water and ½ cup sugar.
- Let rosemary syrup “brew” for half an hour, off the heat. This also cools it.
- Pour concoction into freshly washed and dried jar (dishwasher-cleaned is best) and store, covered, in the fridge for up to two weeks. I add a spoonful to my morning latte for a boujee boost.
Did you make some (or all) of these recipes? Tag us in a photo of your culinary creation on Instagram @linfieldreview for a chance to be featured on our page!